How to Use Price Builder Opus
Master the visual price editor in minutes. Follow along with our comprehensive tutorial.
Overview
Access the Editor
Navigate to WooCommerce → Price Builder in your admin panel.
Choose Scenario
Select the pricing scenario you want to customize.
Design Layout
Drag elements and customize their appearance on the canvas.
Save & Activate
Save your layout and activate it for specific locations.
Accessing the Editor
After installing and activating Price Builder Opus, you'll find it in your WordPress admin panel under the WooCommerce menu.
- Log into your WordPress admin dashboard
- Click on "Price Builder"
- The visual editor will load with your options
Pro Tip: Bookmark the editor page for quick access. You can also add it to your admin menu favorites.
Choosing a Scenario
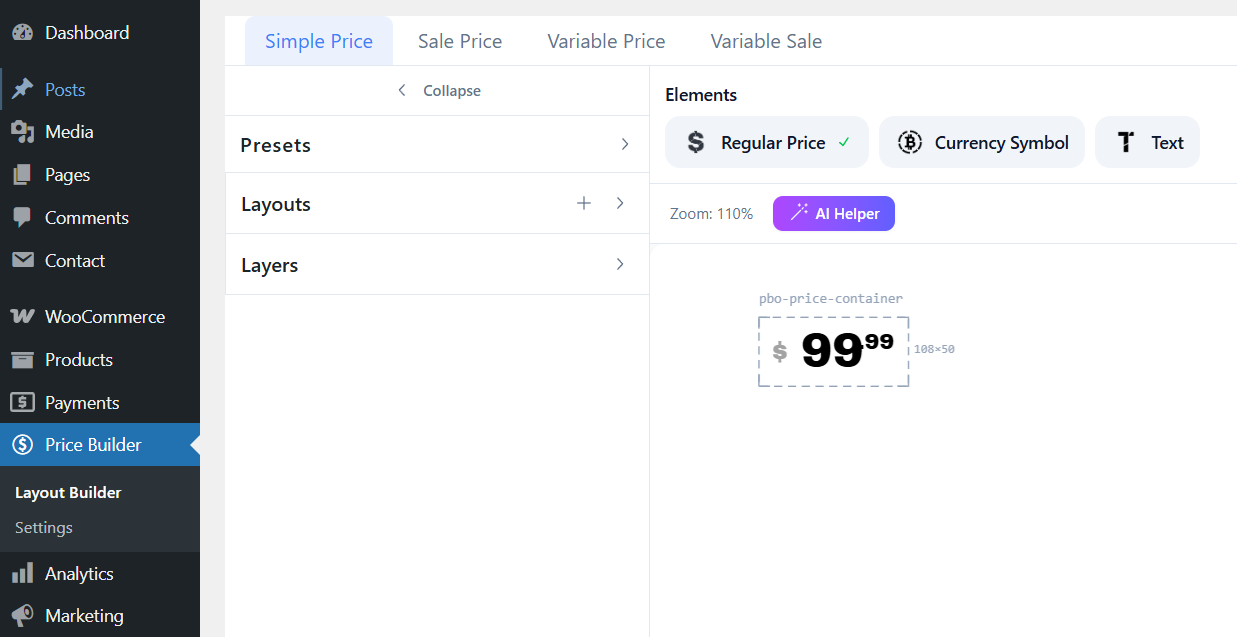
Price Builder Opus supports four pricing scenarios. Each one represents a different product state:
Simple Price
Regular products without variations or sales
Sale Price
Products currently on sale with discounts
Variable Simple
Variable products at regular price
Variable Sale
Variable products on sale
Using Presets
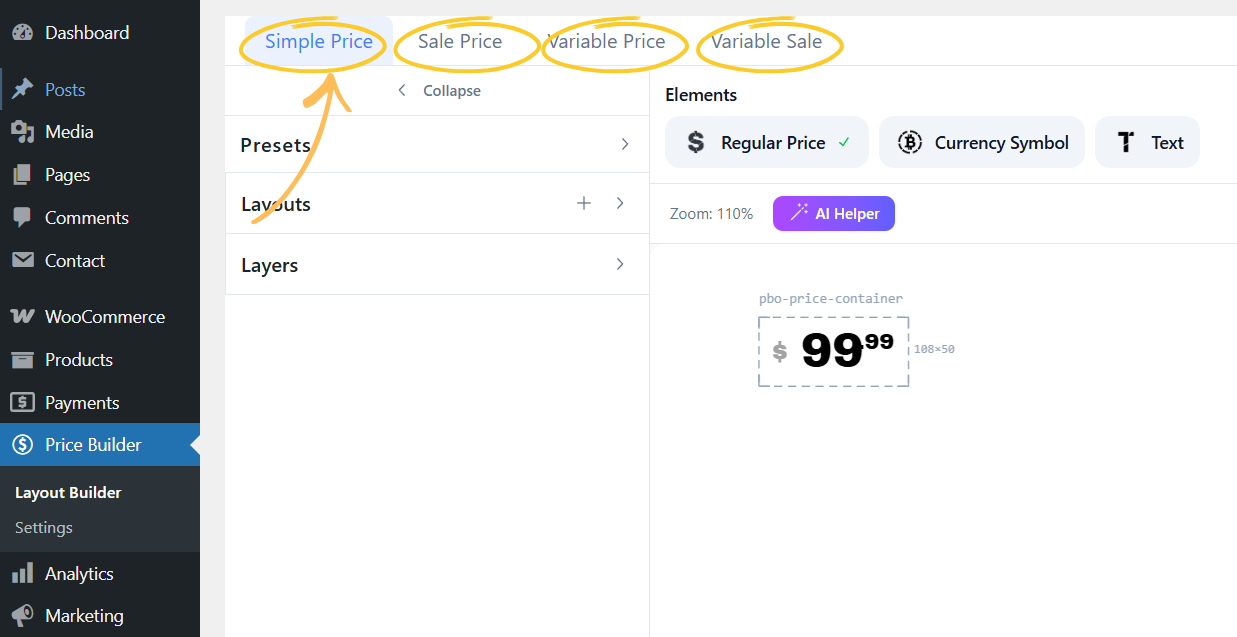
Start quickly with pre-designed layouts or build from scratch:
Standard Presets
Basic layouts for common use cases. Clean and minimal designs that work with any theme.
Advanced Presets
Animated layouts with custom CSS and JavaScript. Effects include counters, slot machines, shimmer gradients, and more.
Note: Selecting a new preset will replace your current canvas. Save your work first!
Working with the Canvas
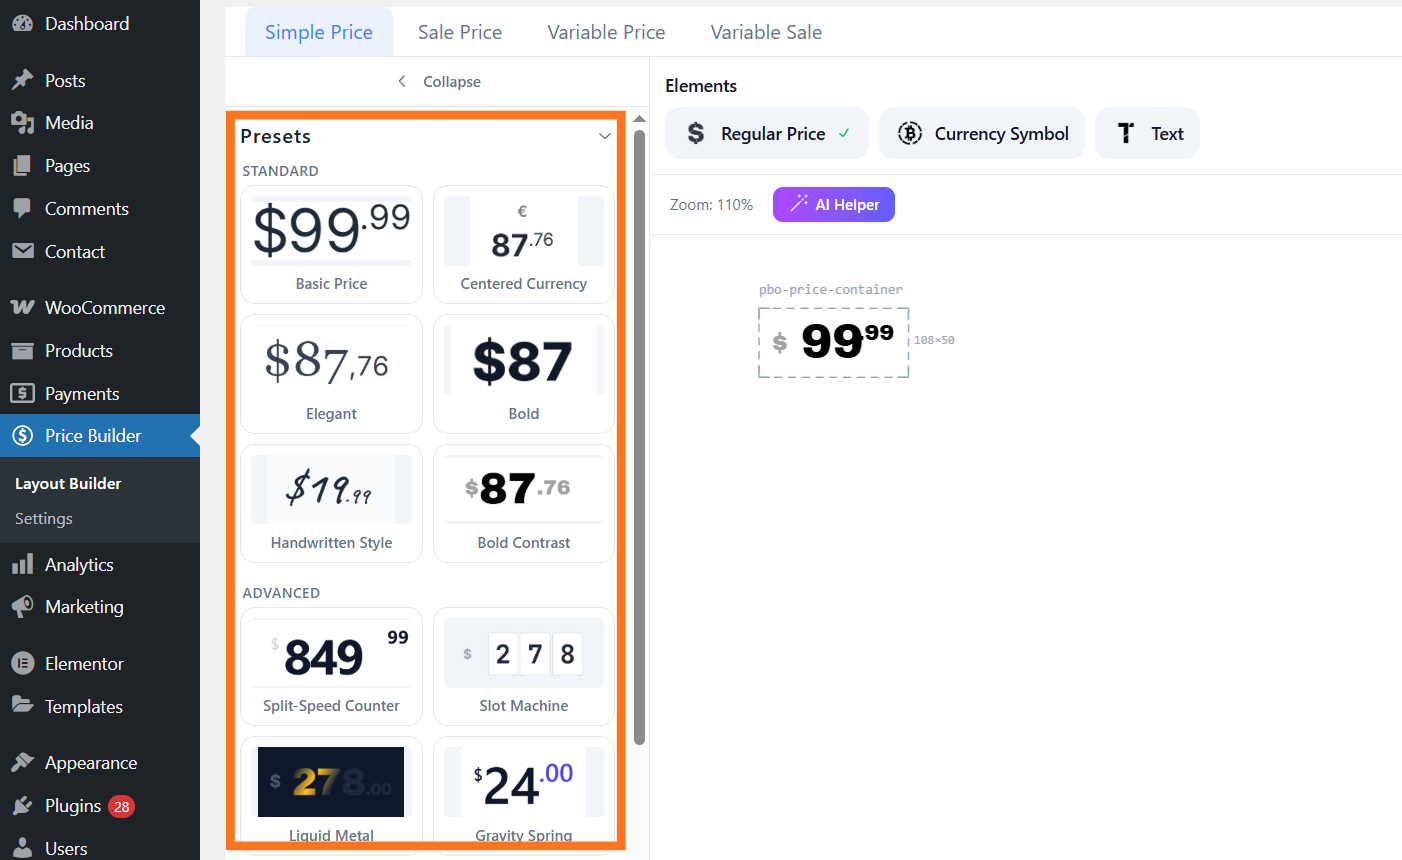
The canvas is your visual workspace. Here's how to use it effectively:
Click and drag elements to reposition them anywhere on the canvas.
Use corner handles to resize. Hold Shift for proportional scaling.
Use the rotation handle above elements to rotate them.
Alignment guides appear automatically when elements align.
Customizing Elements
Click any element to open its settings panel. You can customize:
- Decimal visibility and format
- Currency position
- Custom text content
- Price range display modes
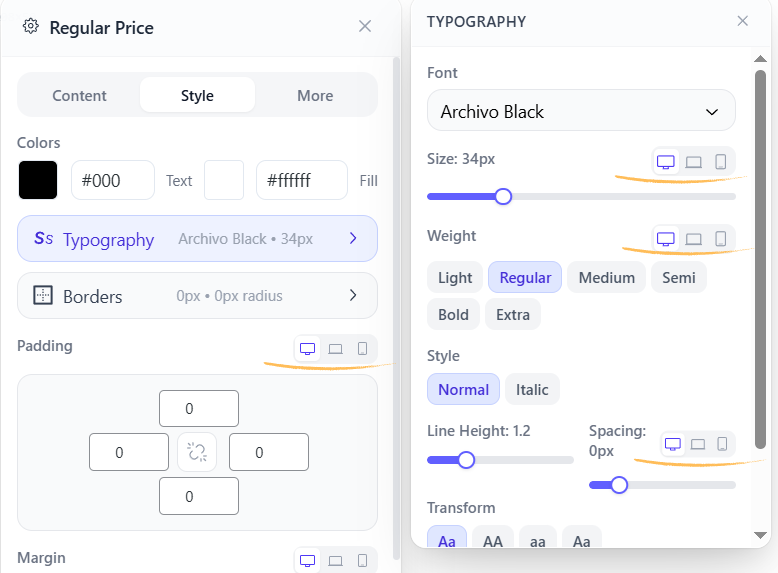
- Typography (font, size, weight)
- Colors and backgrounds
- Borders and radius
- Padding and spacing
- Animations
- Transform options
- Custom HTML override
- Responsive settings
Responsive Design
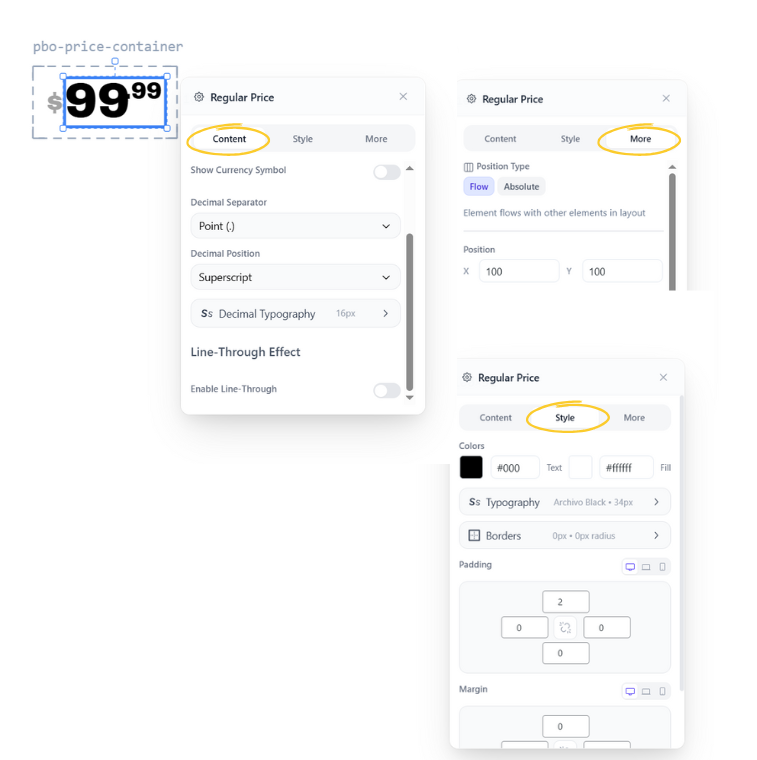
Make your layouts look great on all devices using breakpoint controls:
Responsive properties include font sizes, padding, margins, and border widths. Click the device icons next to any property to set per-breakpoint values.
Saving & Activating
When you're happy with your layout, save and activate it:
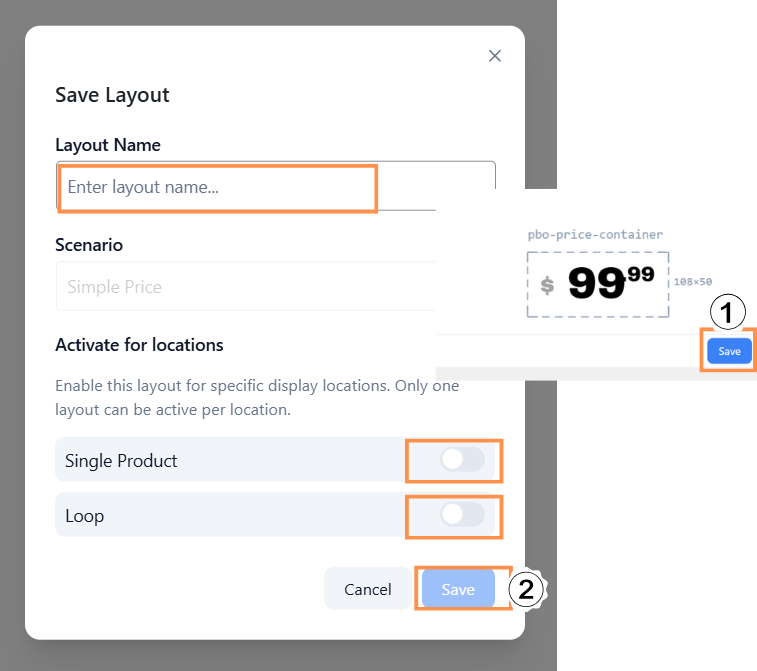
- Click the "Save" button at the bottom right
- Enter a name for your layout
- Select the locations where it should appear:
- Single Product - Product detail pages
- Loop - Shop, category, archive pages
- Click "Save Layout"
Remember: Only one layout can be active per scenario+location combination. Activating a new layout will deactivate any existing one.
Frequently Asked Questions
Can I have different layouts for different products?
Yes! You can use WordPress filters to conditionally disable or switch layouts based on product ID, category, or any custom logic.
Will this affect my site speed?
No. PBO uses server-side rendering by default, generating minimal CSS specific to your layout. There's no performance impact.
Does it work with my theme?
Price Builder Opus is designed to work with any theme. It hooks into WooCommerce's price filters and outputs isolated styles.
Can I add custom fonts?
Absolutely! Use the price_builder_opus_custom_fonts filter to add any font, or extend the Google Fonts list.
Ready to Get Started?
Buy Price Builder Opus and transform your WooCommerce price displays today.